
You know those oversized pumpkin pails at Target (& other places)?

Did you know you could turn it into THIS for a toddler Halloween costume in just a few hours??
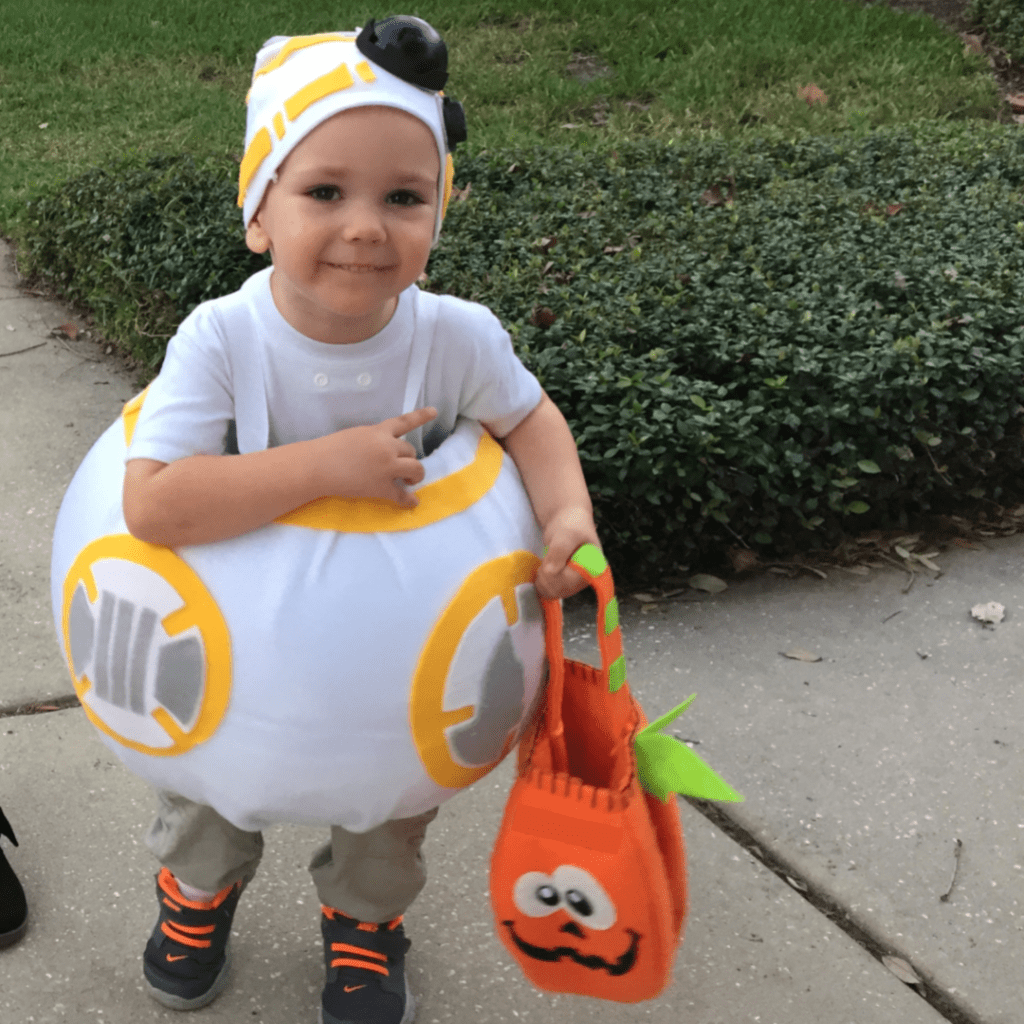

I made this precious BB-8 costume for my son two years ago when he was almost 3, and it was honestly one of the easiest DIY-from-scratch costumes I’ve ever made! And he got SO much love and attention, he loved it! (In fact, he’s almost five now, and he still puts it on from time to time. It’s kind of like the cardboard box concept, right? Kids just love being inside of something!)
Whether you need a last-minute, adorable Halloween costume for your little one or just want to make a fun, pretend-play costume for anytime of year, this is the perfect DIY craft!
All you need is some fleece & felt, white ribbon for straps, and a glue gun! Get a white baby beanie hat (or sew one out of cotton or fleece), some plastic bottle scraps from your recycling bin for hat details, and black paint. And you’re all set!! So easy and fun!
Total Time: 3-5 hours
- Buy fabric: 1 hour
- Cut fabric: 1 hour
- Assemble/glue base: 1 hour
- Hat Details: 1 hour
Materials
- Oversized pumpkin pail like the ones at Target; black or orange would both work great
- White fleece
- You’ll cut 2 pieces this size for the base: height/stretch direction: 20″, width/non-stretch direction: 52″
- Plus more for white cut-shape circles to go on top of the orange circles
- Orange, grey, and white felt (plus tiny pieces of black, red, and yellow for details)
- 1-inch wide white ribbon
- Hot glue gun
- White baby beanie hat (like this one from Amazon,
- Want to DIY the hat? Get some fleece or stretchy cotton fabric; you’ll need a sewing machine and thread (or needle and thread), and a hat pattern like the one found here
- Plastic caps and scraps (I used a ball pit ball [similar here], a plastic screw cap from a milk carton, and a milk gallon cap ring, but you can totally improvise with whatever you have on hand in the recycling bin)
- Black paint for the plastic scraps (I used spray paint, but any kind of paint would work)
- Optional: small piece of black craft foam to go around the “camera”
- Scissors
- Small hand saw, coping saw, or dremel (to cut off the bottom of the pumpkin)
How to Do It
I used this wonderful, super-detailed, step-by-step tutorial from Make It & Love It (my go-to source for detailed costume tutorials!). I’ve added some additional notes and tips below from my own experience making it.
- DIY hat: I used white jersey knit cotton fabric to make the hat, since I knew fleece would be too hot for our Florida temperatures. Plus, the jersey cotton fabric is super stretchy, so I knew it would fit his head for a long time 🙂 (It still fits, two years later!)
- Hat detail materials: For BB-8’s camera, you can use any hollow, smooth ball. I used one of the “parachute balls” we already have (same as like a ball-pit ball), and cut it in half with scissors. I also used a 1″ diameter plastic screw cap from a milk carton (or vinegar bottle, I don’t recall) for the other detail, and a milk gallon cap “ring” (1.5″ diameter) to go around that–all things we already had. And I spray painted them all black (it takes a few coats). I decided to create an outer ring for the ball/camera; I cut a skinny strip black craft foam 9″ long and gave it some varying width.

- Attaching hat details: Probably because I did not use fleece, it was a little difficult for me to glue the plastic onto the hat and have it stay in place. (Even with a lot of hot glue.) So I cut out a circle of white fleece a tiny bit larger than the half ball/“camera,” to sort of use as a base. It was much easier for me to hot glue the “camera” and its ring (optional) onto the fleece circle, and then glue the fleece circle onto the hat. I also used some tape stuck to the inside of the ball, along the edge, to slightly reinforce attaching the ball to the circle. The craft foam ring also helped keep the camera on the hat (I glued the outside of the half ball/camera to the inside of the ring).

- Straps: I hot glued these like in the tutorial, but they eventually (after a few wearings) came apart. I recommend hand sewing them with a few stitches if you want extra support. Or have safety pins on hand just in case, haha!

- Base detail: Below are some of the pics I Google-searched for reference when making BB-8’s detail designs (I tend go a bit overboard with precise detail and wanted it to look EXACTLY like BB-8’s designs, but you can TOTALLY just improvise!). To cut out the four circle-bases, I basically traced around small bowls to draw two different-sized circles on paper: one for the orange layer (mine was 7 1/2″ diameter) and one for the white layer (mine was 5 3/4″ diameter). Then I drew the “cutouts” for the white detail layer and cut out these paper stencils/patterns to use for the felt (four of each layer).

To design the gray sections, I found the reference images above and then cut my gray felt into similar shapes. Then just hot-glue them all together!

- Cutting off the bottom: I had my husband cut the bottom of the pumpkin off for me, just because he’s super familiar with saws and I am not. But he says they’re easy to learn how to use. Don’t have one? Ask a neighbor if you can borrow one! **Be safe! If you have long hair, be sure to tie it up if you’re using a dremel. And don’t wear hanging/flowy clothing.**
And… it was only in writing this post that I just realized I actually never finished this costume fully, hahaha!! I forgot to add {did not prioritize} the skinny horizontal gray stripes and the black/red/yellow felt details on the base. Oops!! But you know what? Literally everyone who sees this costume LOVES it. So if you do add those extra touches, I think it makes it extra-awesome, but it will be fabulous even without them!
Wearing It
I was actually SO surprised by how easy it was for my son to not only walk around in this, but also to sit on a chair, and even in a stroller!!?! I don’t recommend long stints in a stroller, but the pumpkin pail is quite sturdy and isn’t likely to get bent up at all.


This costume/project was so fun, let me know if you decide to give it a try!
